Although installing a doorbell may appear like a job that requires an electrician to be called for his services, it is a task that anybody with basic intelligence can achieve. Those without prior expertise in these topics can feel a little intimidated since many wires and electricity exist. Still, it’s quicker and simpler even than you could expect.
You may securely install the Ring Doorbell Pro hassle-free without an existing doorbell by following the instructions in this article. You will need to buy an 18 VAC doorbell power supply converter that plugs into an outlet close to the door to install a ring doorbell camera without an existing doorbell.
The article covers the installations steps for different models of ring doorbells; follow on to get your installation done quickly and perfectly.
Ring Doorbells Voltage Requirements
The first bit of knowledge you must gather before installing the doorbell is about the voltage requirements of different doorbells.
It is the most crucial step in installing a ring video doorbell, ensuring that your doorbell receives adequate voltage for proper functioning.
The voltage requirement for every Ring doorbell is different.
For the seekers’ convenience, I am mentioning Ring video doorbells and their accompanying voltage requirements so that you don’t have to look for the information elsewhere.
Ring doorbells 2, 3, and 4 require an 8–24 V AC power range.
Ring Doorbell Pro’s voltage range is 16–24 V AC.
Because many of these cameras will function with the 18 VAC doorbell power supply adaptor, this is the most advised and employed power adaptor that customers use.
Any power supply adapter can be used, if it falls within the required voltage range.
How To Install a Ring Doorbell Wired Without An Existing Doorbell?

Ring Elite needs expert installation; other than that, the installation procedures for the three wired Ring Doorbell versions, Ring Wired, Ring Pro, and Pro 2, are identical.
To install Ring Doorbell wired, you will need a 10 and 24 volts transformer. Here are the steps to install a Ring Doorbell wired without an existing doorbell:
Hold the Ring doorbell’s faceplate up to the desired installation location. Label the top and bottom mounting brackets with a pencil.

Use the 1/4-inch small drill, Ring provided in the box to drill the holes for the included anchors if you’re mounting your doorbell on a hard surface such as marble, stucco, brick, or concrete. You can omit this step if you are putting on wood or plastic. (You can check this drill at Amazon)
The terminal security screws on the back of the Ring doorbell are where you should connect the wires exiting your wall.
If the wires are too short, use extension wires and secure them with the wiring nuts to the wires on your doorbell.
With the lengthy mounting screws provided, install the doorbell to the wall and the face plate back on.
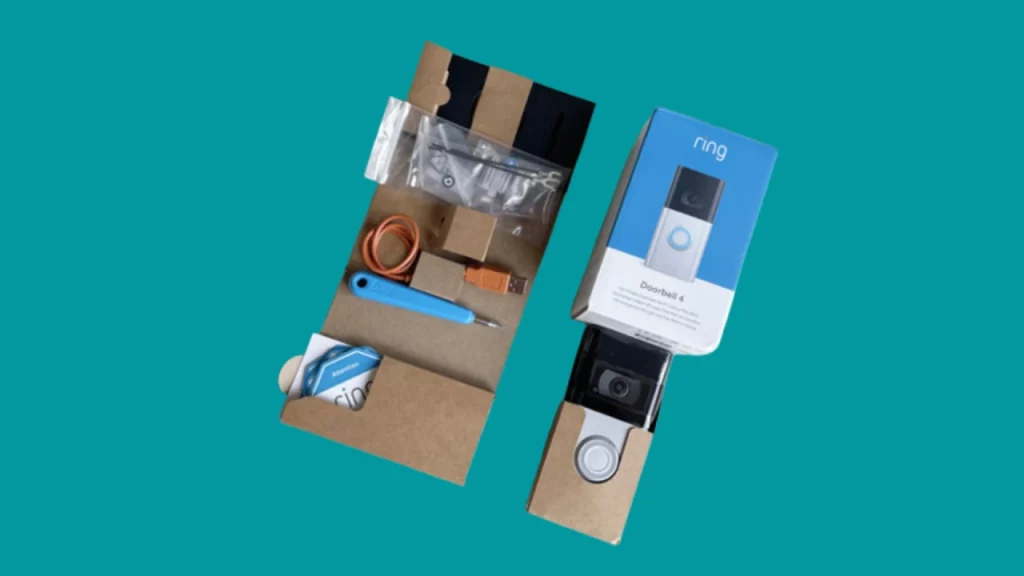
Tighten the unique security screw into the bottom of the doorbell using the specialized blue screwdriver or the star-shaped screwdriver provided.
Switch on electricity. When the setup is complete, the LED light on the doorbell should begin to glow white.
Now, you can set up features like motion detection and notifications and link the doorbell to your Wi-Fi network using the Ring smartphone app.
How To Install Ring Doorbell 4 Without Existing Doorbell?

Ring Video Doorbell 4 is a battery-powered device, so you won’t have to bother with the wiring stuff while installing.
Here are the installation steps to mount Ring Doorbell 4.
As the doorbell is battery-powered, your first step would be to charge the internal battery. The new versions, such as Ring Doorbell 4, may be charged by pressing the release or the battery pack, and then you can separately charge this battery pack.
A little light on the device’s top should turn green when the battery is completely charged.
The second step is to download the Ring app. The Ring app is where all the setup takes place, so before mounting your doorbell, make sure you have the App installed on your smartphone.
You can download the App from the play store for android or the app store for iOS.
You’ll need to register for an account after downloading since you don’t have one. You won’t have to register again if you already have a security camera or chime from the company installed on your property because this single account may host any Ring products.
Next up, you need to place the mounting bracket in the desired location, then mark the locations of the screws. A leveling tool is also included in the box to ensure everything is exactly aligned. The company supplies some plastic anchors with the installation package; you can use those if you install them on a hard surface.
Now, remove the leveling tool from its position and insert the top of the faceplate at an angle to allow it to slide into the mounting bracket. You will hear a slight clicking sound when it fits into the mounting bracket properly.
The last thing is to tighten the screwdriver and star-shaped security screw provided in the installation package to tighten the faceplate.
Your Ring Doorbell 4 mounting is done. You must launch the App on your smartphone and complete the setup process. (1)
Also Check – How To Fix Ring Camera Not Taking Snapshots
How To Install Ring Doorbell 2 and 3 Without an Existing Doorbell?

The doorbell installation process for Doorbell 2 and 3 is similar to how you install a wired doorbell barring a few steps. Nevertheless, I am mentioning all the steps from start to end to ensure everything is clear.
To install the Ring doorbell 2 and Ring Doorbell 3, follow the instructions:
- Use the USB charging cord included to charge the supplied battery completely.
- After that, take off the faceplate and mark the locations of the openings with a pencil using the doorbell. To check that the doorbell is level, use the included little level in the tiny hole on the front of the device.
- Use the one-fourth-inch concrete drill holes if you’re mounting your doorbell on plaster, brickwork, or concrete. Use the tools in the package to bore the holes for the supplied anchors.
- Now, depending on your configuration, screw the doorbell straight to the wall or doorframe.
- It’s time to insert the fully charged batteries into the doorbell’s base. A flashing blue LED light indicates that the doorbell is powered.
- Fasten the faceplate after removing the level. For fastening, you might need to use the star-shaped screwdriver; you must fasten the faceplate to the video doorbell using the security screw that is included.
- Link the doorbell to your Wi-Fi network to complete the setup via the Ring mobile app, turn on features like motion detection and alarms and make other settings and changes.
How To Install Ring Doorbell Pro Without an Existing Doorbell?

Installing Ring Doorbell Pro, first, you should install the Ring app on your computer, laptop, or smartphone, log in to your Ring account, and create one if you need to.
After you are done with installing the App, we will head towards the installation of the physical unit. Ensure your Ring Doorbell Pro’s battery is fully charged and inserted.
For charging the battery, a micro-USB cord must be there that come with your Ring Doorbell Pro; you can use the cord. All you need to do is to put the USB cable’s other end in the rear of the doorbell and plug the other end into a power source.
The LED indication for your Ring Doorbell Pro’s battery life will start glowing, indicating that the battery is charging. The LED indication circle will be fully lit when the battery is fully charged. You may now proceed with the installation.
For the installation part, firmly attach the faceplate to your door frame where you intend to mount the doorbell.
After that, center the faceplate on the level. The level must come with other items in the package. Ensure that it is perfectly levelled.
While holding the leveled faceplate, you should mark the screw holes in the four corners with a pencil.
Using your screwdriver, insert the screws included into the doorframe and inside the holes in the faceplate’s corners.
If you are mounting the doorbell into a hard wall as concrete, use the anchor bolts that also come with the company-supplied package.
Drill four mounting holes into the doorframe using the provided drill bit. After that, insert the plastic anchor bolts and screw the screws straight into them.
You can start using the Ring Doorbell Pro when everything is set up. Remember that the Ring Doorbell must be fully charged, and the App must be open on your phone, tablet, or computer. You must input the address of your house and the location of the doorbell, such as the front door, and set the motion detector’s sensitivity.
Use the pushbutton on the front to launch the Ring Doorbell Pro and evaluate the video quality. Ensure that your network is uncluttered and your Wi-Fi router is situated close to the Ring device.
Consider setting up a different Wi-Fi connection for the doorbell if the video quality is not optimal.
Final Thoughts
As must be evident post reading the article, the installation process for any Ring Doorbell without an existing doorbell is quite easy if the instruction manual is followed to the heart. Drilling might be an issue for some people, but if you search the market, you will get some really handy ones that even a kid can operate.
However, if yours is a wired model and you are wary of dealing with doorbell wires and electricity, I suggest you call an electrician. Though you will incur installation charges, professional installation saves you from many errors.
Frequently Asked Questions (FAQs)
How can I power a Ring Doorbell?
That depends upon the version you choose to install at your property. Some models as Ring Doorbell 4, are battery-powered. With the help of the supplied rechargeable battery, your Ring Video Doorbell may operate independently of an external power source. However, it will need to be recharged frequently. Other models need to be wired to access a power outlet.
Can Ring Doorbell 4 be hardwired to the existing doorbell?
Though Ring Doorbell 4 is a battery-powered device, it can be hardwired to your existing doorbell. It comes with a removable battery pack that can be released from the doorbell, charged separately, and later inserted to power your device. However, hardwiring is a good option if you don’t want to get mired in the hassles of recharging batteries.
What transformer do I require for a Ring Doorbell Pro installation?
Transformer specifications for the Ring video doorbell pro must be between 16 and 24 volts and 20 to 30 amps. Before installation, you should make sure that your current transformer complies with these requirements. There is probably a transformer in your home if your doorbell has an exterior chime that is physically connected.


![Ring Doorbell Delay [Solved]: How To Fix](https://howtl.com/wp-content/uploads/2022/09/ring-doorbell-delay-768x432.webp)
![How long does my Ring doorbell battery last? [Ring Doorbell 1, 2, Pro and Elite]](images/ring-doorbell-768x432.jpg)